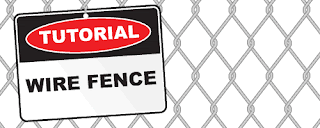
 Learn how to create a wire fence pattern from scratch using the line tool.
1. Drawing the Zig Zag Fence

First, select the Line Tool from the Tool Palette and draw a long straight vertical line. This will determine the fence height. Go Effect>Distort & Transform>Zig Zag to apply the zig zag effect. Adjust Ridges and Size to set the fence mesh shape. Make sure the Points is set to Corner.

Now we will round the corners. Go Effect>Stylize>Round Corners and enter the radius to round out the sharp corners. Next, set the Weight of the Stroke to 5pt and set it to dark grey color.

Select the line and press Ctrl/Command+C to copy it and Ctrl/Command+F to paste a duplicate infront. Set the duplicated line weight to 1pt and change the stroke color to light grey.
2. Blending the Wire Fence

We will now proceed to blend both lines to give a 3D look. Go Object>Expand Appearance to expand the effects. Then go Object>Expand to expand the strokes. The stroke will now turn into shapes. With both shapes still selected, go Object>Blend>Make to blend both shapes. Next, go Object>Blend>Blend Options and set the Specified Steps to 3 for Blend Options. Finally, we will need to expand the blend before diving it in the next step. Go Object>Expand to expand the wire.
3. Dividing the corners

Now, select the line tool and draw straight lines over the corners of the wire. We will need to break it into individual segments so that we can achieve the wire twisting effect. Select everything and go to Window>Pathfinder and select Divide. Press Ctrl/Command+G to ungroup it.

Select each individual segments and group it by pressing Ctrl/Command+G. Do this for all the segements.
4. Creating the Fence Pattern

Select all and press Alt/Option as you drag a new instance beside it. Offset it until the edges touches the next wire as shown on the left. Select all and press Alt/Option while holding Shift to create a duplicate beisde it. Press Ctrl/Command+D to repeat the steps to generate a row of wire fence.

We notice that the wires are stacking on top of each other. To create the twist effect, we will need to send some segments of the wire below each other. Starting from the top, select a row of segments you want to send down and press Ctrl+Shift+{ / Command+shift+{ to send it to the bottom. Repeat from the top to the bottom, until you achieve the twist effect for the fence.
5. Final Wire Fence

Here is the final wire fence. Hope you find this trick useful for creating repeated patterns.


1 comments:
Salam Nur.. ada satu kompeni di kepong tempat kwn saya sedang carik designer full-time.. Boss ok, saya kenal hehe.. Kalau berminat sila emel saye di onggon@gmail.com dan sy akan emelkan detail...
Post a Comment