Wednesday, December 31, 2008

Design a Stylish Fashion Advert

In this Photoshop tutorial we’ll be designing a simple but stylish fashion-themed advert. You know, so you can sell sunglasses and stuff ;)

Stylish Fashion Advert Photoshop Tutorial

1. Document Creation

Get started by finding a nice, suitable stock photo to work with. For this you’ll want to use one of the following websites:

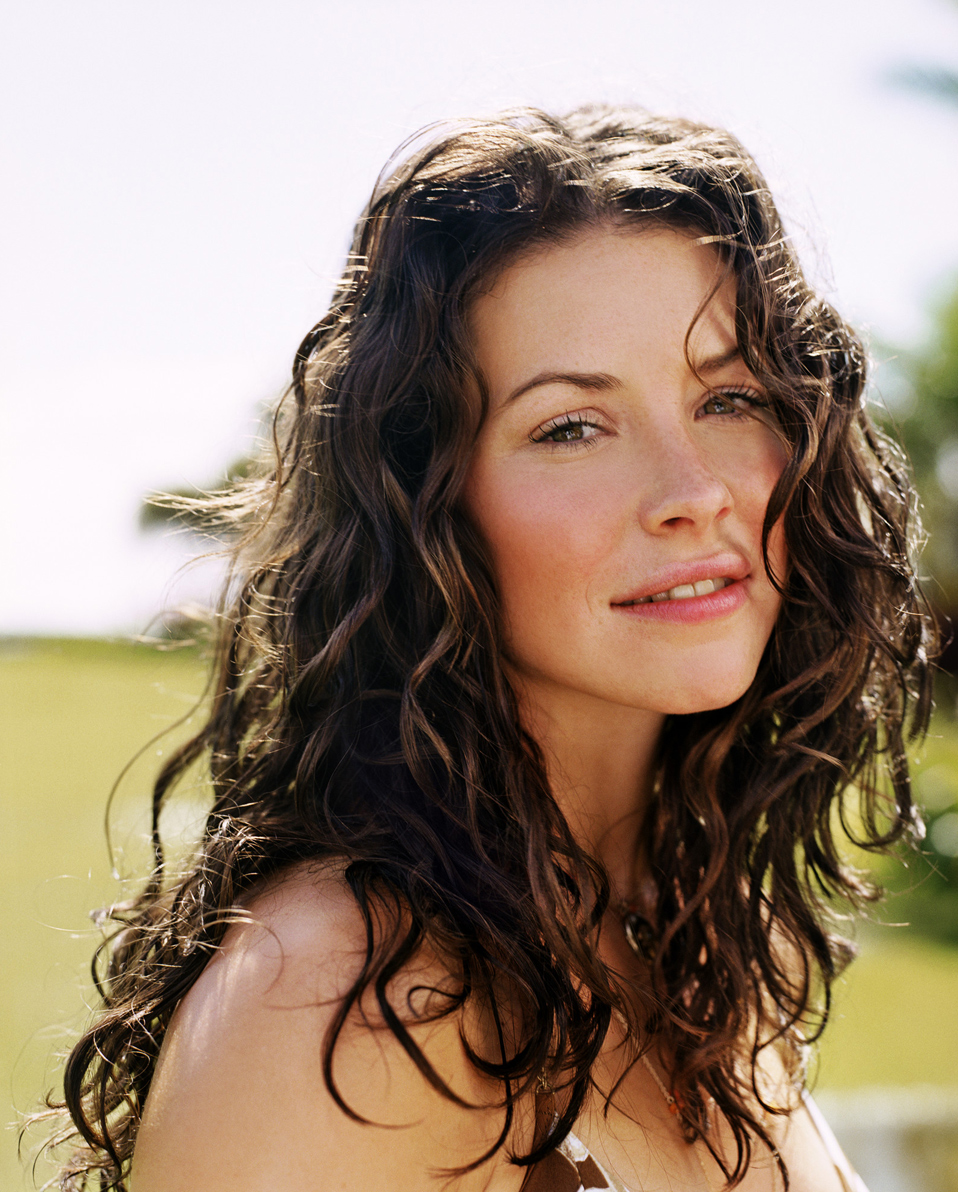
I used a stock photo that I bought/downloaded for free (can’t remember exactly) from iStockPhoto a while ago.

Stock Photo Chosen

As you can see, I’ve chosen a photo of a pretty girl wearing big sunglasses (now the theme of the design). Open your photo in Photoshop and get to work by resizing it, copying it to a new document, or whatever you want to do with it.

2. Colourise

Create a new layer (layer > new > layer) then get out the Gradient Tool. Using the gradient tool, add a very bright radial gradient onto your new layer (like this):

Bright Radial Gradient Added

Try a few different layer modes and see which one looks best to you (I chose Screen):

Layer Mode Changed to Screen

You might also want to try a few different Solid Color fill layers, then mess with the settings for those, but this will be fine for now.

Please note that the colors that I used in the radial gradient were roughly #f743fb and #6909d1.

3. Shapes / Details

For this part of the tutorial you might want to hide the layer we previously made (the gradient layer). Start by getting out the Custom Shape Tool and finding the heart shape (or any other shape you think would look cool). Create a new layer and make a few white hearts on your canvas.

White Heart Shapes Added

As you can see in the above image, I also rotated a few of my heart shapes to make it look a little more interesting! Finish off with the hearts by adding a larger, pink-filled one in the background (behind your white shapes).

Larger Shape Added

I finished up by lowering the opacity for the larger heart shape layer, and erasing a few of the edges from the smaller heart shapes (see in the below image):

Heart Shapes Adjusted

Take note that this isn’t an exact science! Get creative here.

4. Halftone Effect

Now we want to add something really interesting on top of our hearts/shapes. Start by opening the Channels tab (window > channels) and creating a new channel (create a new channel by clicking the icon at the bottom of the palette). You might need/want to make a new layer before doing this channel business.

Add New Channel in Channels Palette

After you’ve made yourself a new channel, get out the brush tool, and using a large, soft brush, dob a few times onto your black canvas (making sure your new channel is selected).

Add Brushing to Custom Channel

Now to make an interesting effect out of these boring dobs — go to Filter > Pixelate > Color Halftone and use an appropriate setting (you’ll have to press OK and check if it’s good enough). Using 32 as your Max. Radius should be good enough.

Pixelate Color Halftone Filter Added

Now, holding ctrl down on your keyboard, click on the thumbnail for your new channel, this will select the pixels. Go back to your layers palette and select a new/blank layer. Fill your newly-made selection in the fresh layer with the very bright & colorful gradient that comes with Photoshop.

Colorful Gradient Added to Halftone Selection

To finish off with the halftone effect, you might want to erase the shape away a little bit, in case it’s hiding a bit of the face. Or you could go back to the channel and redo it so it’s a little more to your liking. Unhide your previously-hidden gradient layer and see how it’s looking now!

Unhide Screen Gradient Layer

5. Image Adjustments

It would probably have made more sense to do the image adjustments at the start of the tutorial, but now we know what our outcome is mostly going to look like, we can make some photo adjustments to our stock. The main thing I did was add a levels adjustment layer below our screen gradient layer (note: layer > new adjustment layer > levels).

Levels Adjustment Layer

You may also want to adjust the photo in a few other ways, for example, you could make her lips sparkle a little more? I don’t know! ;)

5. Add Text

This design wouldn’t be complete without some sort of text now, would it? Start by getting out the Horizontal Type Tool (just the regular text tool!) and write out some text, in this case I used two sets of text, one reading YOUR 2ND PAIR and the second set of text reading 50% OFF.

Decker Font Used for Text

The beautiful font which I’ve used above is called Decker, and you can download it completely for free at Urban Fonts. For all of the text I used Decker Regular, except for the word OFF, which I used Decker Bold on. After you’re all done with the text settings, position it accordingly.

Text Positioned Lower Right

I’m not actually sure where would be the best place for this text. If you find your text doesn’t fit, you could always make it smaller and add a Drop Shadow to make it stand out a little more.

Additional Effects

Basically now you should get creative and throw whatever you’ve got onto the canvas, such as patterns, maybe textures, other stock photos, something to go with the theme you’re working with. One thing that I thought was a good idea was to add a scan line pattern into the corner and make it blend in nicely using the layer modes.

Just remember though, you can download the complete PSD file from this tutorial, so if there was something you need help with or want to check out, please feel free to download the PSD file. Another thing to do after you’re all done is change the colors used in your Screen gradient layer, you might come up with a surprisingly nice result!

Stylish Fashion Advert Photoshop Tutorial

Simple & Cool Urban-Style Logo

In this Photoshop tutorial we’ll be learning how to design a simple, urban-style logo, good for your local band website or something like that ;) You can see exactly what we’ll be designing below.

Cool Urban Logo Tutorial Result

1. Document

I’ll be using a document size of 500 x 500 pixels for this tutorial, but something like 800 x 600 pixels or similar will be great. Fill the background with white by using the Paint Bucket Tool.

2. Font Selection

Here I went with a font called Juice, an urban-style, kind of like a graffiti font. Use the Horizontal Type Tool and add your text in the center of the image.

Suitable Font “Juice”

For a good font selection, you should check out a recent article published at You the Designer: Twelve Fantastically Free Graffiti Fonts.

3. Type Settings

Set the baseline shift, so the two words are stacked. Change the font color to white, and add a 3-4 pixel black outline. You can do this by double clicking the font layer, and selecting “Stroke” near the bottom in the Layer Style menu.

Text Settings

4. Type Settings (again)

Even out the width of the two words, by enlarging the smaller word until it fits.

Smaller Text Largened

5. Text Background

Next, fill in any holes between the letters by using a black vector shape. Use the Pen Tool, or you can fill it in with a brush. (Though using vector makes fixing mistakes a breeze)

Using Pen Tool to Fill in Background

Now simply drag the layer down, behind the type in the Layer window.

Layer Order Changed

6. Text Inner Shadow

To give some dimension, we’ll add an inner shadow to the type layer. Double click the font layer and select Inner Shadow in the Layer Style menu. Here, I went with 33% opacity at a -34 angle. For distance choose 4px and size 3px. This blurs the shadow a bit, making any holes in the shadow less noticeable.

Inner Shadow Layer Style Setting

7. Additional Shapes

Now we’ll begin to add some other shapes to the image. Using the Pen Tool, I created a crown on the P. Use the same Layer Style as the type. Right click the font layer and select Copy Layer Style. Now that the layer style is on your clipboard, paste it on your crown by selecting Paste Layer Style.

Crown Shape Pen Tool

8. More Shapes

Next, I’ve added stars on the bottom left corner of the type using the same process in Step 8. If there are holes in between the type and images, repeat Step 5 for remaining holes.

Star Shapes Pen Tool

Here, I’ve added a small stripe under the name to bring everything together. Follow step 8 and 5 once again.

Text Strip Added

9. Add Lines (Cracks) to Text

Using the Pen Tool, you can make stylized lines throughout the type. It’s important not to go overboard here! Make sure you’re consistent on the widths, and how far from the edge they are. Things can go wrong here quickly, so leaving it plain or simple is always better than a messy piece!

Added Stripes using Pen Tool

Vollständige

For presentation, you can finish off by adding a nice, dark gradient to the background, then maybe a little grunge, a texture. Get creative and you’ll come up with something nice! :)

Cool Urban Logo Tutorial Result

Hot & Fiery Photo Effect

Basically, in this tutorial I’m going to be showing you how to create a photo effect like the one in the below image, it’s pretty much all accomplished by using Filters, as are most photo effects, right? Photo manipulation on the other hand uses many tools of the trade, most commonly “airbrushing”, as everyone calls it. But we’re just going to be making a nice, hot, fiery kind of photo effect in this tutorial!

Hot & Fiery Photo Effect Tutorial Result

1. Selecting a Stock Photo, etc.

Firstly, start by finding a stock photo that you can add the effect to.

2. Ripple Filter Effect

Now open up your stock photo in Photoshop, you can either keep it at it’s current size of resize it down a little bit, I resized it a little bit for the sake of this tutorial. After you’ve opened the photo, you might want to brighten it up a little or sharpen it, I didn’t though. I started by duplicating the original layer then applying Filter > Distort > Ripple to the duplicate layer. After this, lower the opacity for your duplicate layer to 40-50% and change the layer mode to either Darken or Multiply, I used Multiply.

Filter Distort Ripple Result

This just gave it a little effect, if you want to make it seem more like smoke or something, maybe try Filter > Distort > Wave.

3. Colorizing

Now it’s time to add some fire color. Start by creating a new layer.

Now in your new layer, using the Radial Gradient Tool, drag a red gradient over the whole document. The two reds I used were #f82714 and #8c0900.

Red Radial Gradient

Now, change the layer mode for this gradient layer to Color and lower the opacity to about 30-50%.

Layer Mode and Opacity Change

Now another gradient - create another layer and fill it with a bright orange radial gradient.

Bright Orange Radial Gradient

The colors I used for this gradient were #febb0f and #fe5400.

After making your gradient, change the layer mode to something like Overlay and lower the opacity if it needs it, in this case I didn’t lower the opacity.

Layer Mode changed to Overlay

4. Additional Effects

To finish this off, duplicate the original layer, or merge all your layers together, then apply some different filters, change the layer modes, etc. You need to be creative here. I duplicated the original layer, moved it above all the others then applied Filter > Brush Strokes > Crosshatch and messed around with the layer mode/opacity.

Also try Filter > Render > Lighting Effects as well as Filter > Noise > Add Noise.

You can see my result image below:

Hot & Fiery Photo Effect Tutorial Result

Mess around with all the different filter effects and layer modes, you might also want to try some grunge brushing.

5. In finishing

Well, sorry, but that’s it! You may want to download the PSD file from this tutorial to see what I finished it off with, if so, you can download it from here.

Hot & Fiery Photo Effect Tutorial Result

Summer Photo Manipulation

In this quick Photoshop tutorial I’ll teach you how to make a nice, warm, summer photo manipulation for a photo. This tutorial best works for fairly colorful, fairly bright photos. In this tutorial I will be using this stock photo of the lovely Evangeline Lilly.

Evangeline Lilly Photoshop Tutorial

1.

Firstly, you should find a nice stock photo to work with. As I mentioned above, I used a nice photo of Evangeline Lilly, if you want you can download it and get to work. Start by flipping the image so it’s around the right way, then crop and resize if necessary. I ended up with a document size of 360 x 450 pixels.

re-sized and flipped

2.

Duplicate the Background layer then apply Filter > Sharpen > Sharpen once, then fade it to about 50% (Edit > Fade). This will bring out the details a little bit.

applied filter sharpen

Next, using the Blur Tool, blur the edges (her hair) a little bit, if it’s too strong you can change the strength of the Blur Tool. This just focuses on her face a little bit more.

blurred hair

3.

Again, apply Filter > Sharpen > Sharpen and fade it to about 15-30%, remember, this stuff is optional. Next thing to do is get the Gradient Tool and set the following settings:

gradient options

The colors I’m using are #b66d39 and #42352f. On a new layer, draw your gradien on the canvas, starting with the lighter color in the bottom left and the darker color at the top right.

radial gradient

Change the layer mode for your gradient layer to Screen and lower the opacity to about 95%.

layer mode options

You will be left with a nice, warm result like this:

gradient on screen mode

Beautiful!

4.

Now to add a few color adjustments. Start by making a Brightness/Contrast layer by going to Layer > New Adjustment Layer > Brightness/Contrast… with similar settings to these:

brightness contrast settings

This just brightened it up a little bit.

after brightness contrast

Lastly, I added a Photo Filter (Layer > New Adjustment Layer > Photo Filter…,) these are only available in Photoshop CS2 and up.

photo filter settings

This just added in a little bit more yellow, I’m not sure if I’m too fond of it actually.

after the photo filter

5.

Lastly, I added a border around the photo, and a few plain white shapes to the right side of the photo. These shapes come with Photoshop, you can find them by getting the Custom Shape Tool and selecting All when in the shapes category.

Warm Photo Effect Photoshop Tutorial Evangeline Lilly


design by Nur for Cool Style Graphics.