Saturday, June 13, 2009

Photo Strip (Photoshop Tutorial)


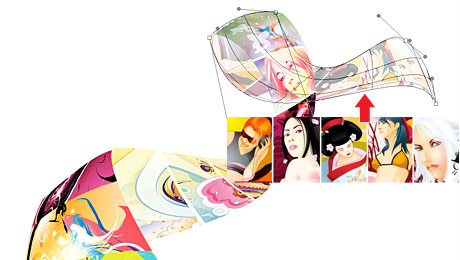
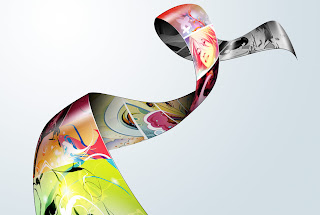
The warp tool will be used to create the twisting effect (so, you need Photoshop CS2 or above to complete this tutorial). With the completion of this tutorial, you will be able build a photo strip with your own photos or artwork. Don’t miss out this fantastic feature!

1. Create a Strip (Vector Shapes)

First, create a strip with the Pen tool (either in Photoshop or Illustrator). We will use these shapes as a guideline and for masking purposes.
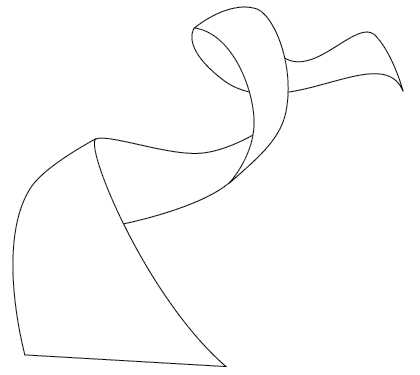
stripe outline shapes

2. Photo Stack

Choose 3 photos of your choice and stack them together.
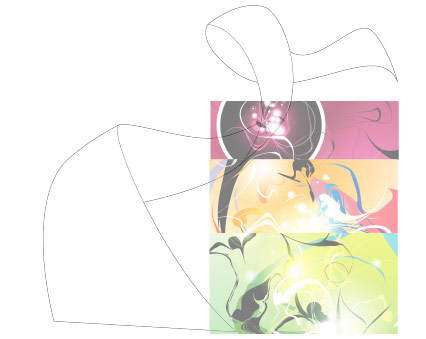
photo stack

3. Warping (Photoshop Warp Tool)

Adjust the layer opacity to 40 or 50% so you can see the guideline underneath. Go to Edit > Transform > Warp. Now you should see a grid and 4 anchor points in the corner. To bending the image, simply drag the anchor points, direction points, or grid lines.
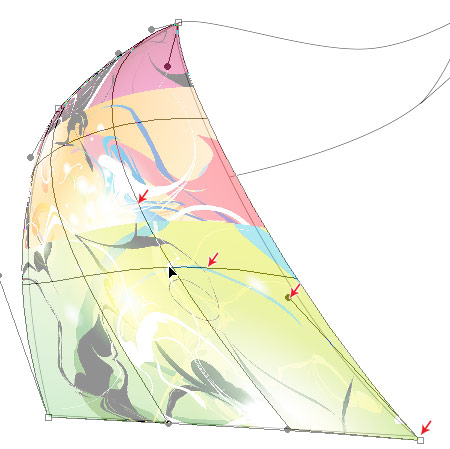
grid 1

Repeat this step for the rest of the strip. Since this step is relatively simple and repeatitive, I’m not going to get into the details. Here are the screenshots of the steps:
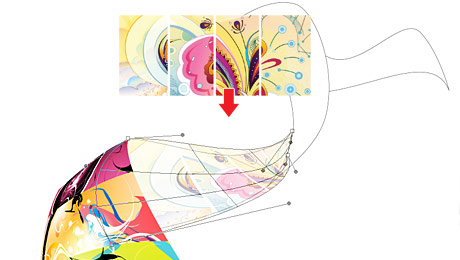
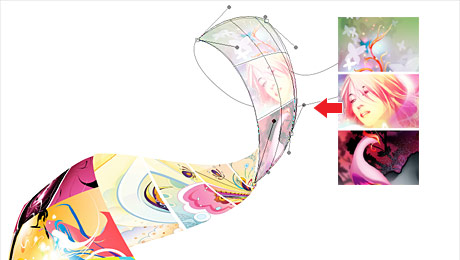
grid 2

grid 3

grid 4

4. Masking

Organize the layers into groups (ie. strip 1, 2, 3, 4).
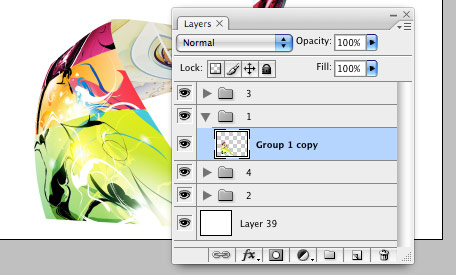
layer groups

Load selection from the shapes you created in step 1 and add a layer mask for each group (so you get a perfect smooth curve).
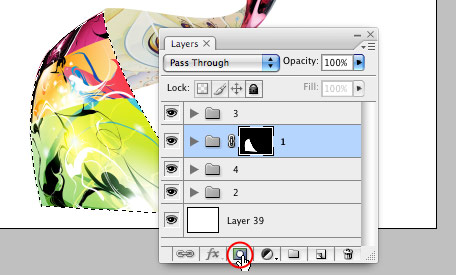
layer mask

5. Shadows

In masked group 1, create a new layer above the strip. Use the Gradient tool and drag from the top to bottom to create a black gradient.
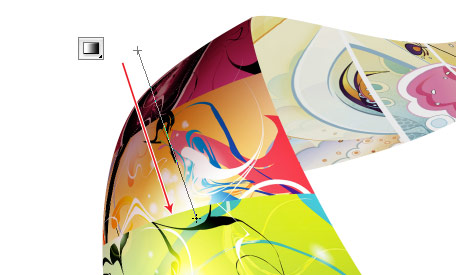
shadow

Repeat this step for the other strips.

shadows

6. Highlights

To make highlighted and glossy areas: create a round glowing circle, compress it, and rotate it in the angle according to your strip’s direction.
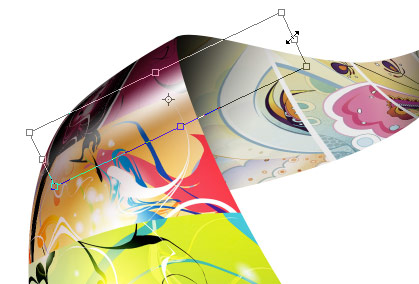
shadow

7. Line Strokes

To make line strokes: load a selection of the mask, create a new layer, fill it with black, shift the selection to the left by 1 or 2 pixels, delete the selected area by pressing the Delete key.
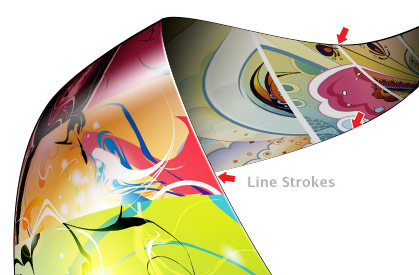
line strokes

8. Final Touches

To make the image look more interesting, desaturated the two strips in the back.

Tuesday, June 2, 2009

Create a Face Shattering Effect


Preparations:

We will need close-up image of a nice face, prefably facing front. I’m using one of Jessica Alba wallpapers in this tutorial. You will also need the Reborn Brush created by Rubina119.

Click here to download the Reborn Brushes.

All rights of these resources belong to their respective owners.


Step 1 - Setting Up Background:

Create a document of size 750×550 pixels.

Fill the Background layer with #000000.

Place the face at the center of the document and use Soft Eraser tool to remove the other unwanted background.


Step 2a - Drawing Face Grids:

Create a new document of size 20×20 pixels and create a new layer. Use Pencil tool with size 1px and color #FFFFFF, draw left and bottom border to form a "L". Hide the Background layer and click Ctrl+A. Go to Edit > Define Pattern. Name this pattern as Grid.

Back to Jessica Alba’s document, create a new layer above the Face. Use the Paint Bucket tool and select to fill with Grid pattern


Step 2b - Drawing Face Grids:

Remove those grids that cross outside of the face area.

Go to Edit > Transform > Warp.

Distort the grids the way shown in the diagram.


Step 2c - Drawing Face Grids:

Set the opacity of the grid layer to 20%.

Right-click on the grid layer and choose Blending Options.

Activate Outer Glow and set its Blend Mode to Color Dodge, Opacity to 100%, Color to #FFFFFF, Spread to 0 and Size to 5px. Leave the rest of the settings as default.


Step 3a - Shattered Blocks:

Create a new layer and name it as Holes.

With Pen tool, path out several square holes according to the face grids.

Go to the Paths tab, Ctrl+left click on the work path layer created. Back to Layers tab, select the Holes layer and fill the selection with #000000.


Step 3b - Shattered Blocks:

Ctrl+left click on the Holes layer to load selection.

Select the Face layer and hit Ctrl+X to cut out the pixels. Then press Ctrl+V to paste and then name this new layer as Blocks.

Drag the blocks to the right with Move tool. Go to Edit > Free Transform to reduce the size slightly.


Step 3c - Shattered Blocks:

Duplicate the Blocks layer. Shift the lower Blocks layer 1 pixel to the left. Repeat this for 10 times and you will get some sort of extruding effect. Merge these 10 layers of duplicated Blocks and name this new merged layer as Sides. Right-click on the Sides layer and choose Blending Options. Activate Gradient Overlay and set Blend Mode to Normal, Opacity to 80%, Gradient from #000000 to #D58761 and Angle to 180. Leave the rest as default.


Step 3d - Shattered Blocks:

Activate Pattern Overlay and set Blend Mode to Multiply, Opacity to 100% Pattern to Metal Landscape. Leave the rest as default.

Right-click on Blocks layer and choose Blending Options. Activate Outer Glow and set Blend Mode to Color Dodge, Opacity to 75%, Color to #FFFFFF and Size to 10px. Leave the rest as default.


Step 3e - Shattered Blocks:

Repeat Step 3a to 3d for 2-3 more times to form more blocks floating towards the right.


Step 4 - Adding Depth to Holes:

Merge all the Holes layers. Right-click on the merged layer and choose Blending Options.

Activate Bevel and Emboss, set the Style to Inner Bevel, Depth to 72%, Size to 5px, Soften to 0px, Angle to 0, Altitude to 50, Highlight Mode to Screen, Highlight Color to #DCA57E, Highlight Opacity to 100%, Shadow Mode to Multiply, Shadow Color to #000000 and Shadow Opacity to 75%. Leave the rest of settings as default.


Step 5 - Adding Smoke:

Create a new layer below the Blocks and name it as Smoke. Set the foreground color to #FFFFFF. Load the Reborn brushes downloaded earlier and paint a few smoke of different sizes on this layer.

Right-click on the Smoke layer and choose Blending Options. Activate Outer Glow and set its Blend Mode to Linear Dodge (Add), Opacity to 75%, Color to #FFFFFF, Spread to 0px and Size to 5px. Leave the rest of settings as default.


Step 6 - Adding Dark Blocks:

Create a new layer and name it as Dark Blocks.

Using Pen tool, path out few more blocks along the face grid. Fill the shapes with #000000.

Set the Blend Mode of Dark Blocks layer to Soft Light.


Step 7 - Adding Light Blocks:

Create a new layer and name is as Light Blocks.

Similar to Step 6 but this time fill the shapes with #FFFFFF.

Set the Blend Mode of Light Blocks layer to Soft Light.


Step 8 - Adjusting Colors:

Now we need to smooth the face a little. Select the Face layer and go to Filter > Blur > Surface Blur. Set the Radius to 5px and Threshold to 15 levels.

Create a new Levels Adjustment Layer and key in 10, 1.25, 244.

Create a new layer and using a large Soft Brush tool with color #000000 and opacity 40%, paint some dark areas on the right to fade the blocks slightly.


Optional:

I merely added a barcode on her right arm to complete the design.

This is another long tutorial and I hope you will like this effect.


design by Nur for Cool Style Graphics.