For the 3D Revolve Options in Illustrator, we need to create the front view outline shape of the object we want. It always goes from the center point to the outline of the object.
Step 1
Lets start with our push pin. Create a new file. Drag a vertical guide onto the artboard. Select the Pen Tool(P), set the fill color to none, and the stroke to black. Note that you can change the color at anytime later on. Then draw a line, as you see in the image below.
Step 2
Select the path and open the Revolve Window under Effects > 3D > Revolve.
Step 3
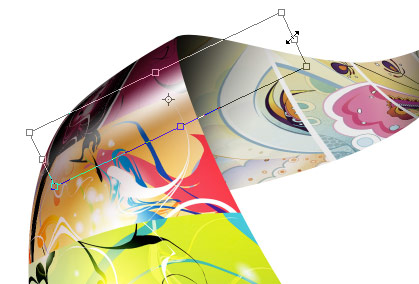
As you can see, we have quite a few options to apply to our path. Select the Preview option. This will give us a live view of our object. Chose the following settings: X axis of -35 degrees, Y axis of -28 degrees, Z axis of 38 degrees, and leave the Perspective at 0.
Click the More Options Button. Underneath the Revolve tab, you will see the Surface Options. Let's have a closer look at the options. You can see one Highlight Point that we can move around by clicking and dragging it. We can also change the intensity of the lights. If we choose to, we can add more highlight points by clicking the New light button. In our case, we don't need to change anything. But you can play around and add more highlights if you'd like.
Step 4
Open the Swatch Palette and go to Open Swatch Library and select the Earthtone swatches. I chose a nice blue color. Select the path of the 3D pin and change the color. You can of course choose any color you prefer.
Step 5
Let's create the metal pin. Draw a shape like you see in the image below. Make sure that the two points are vertically aligned. You can achieve this by selecting them both with the Direct Selection Tool (A), and press Ctrl + Alt + J to open the Average Palette. From there choose Vertical. Then click OK.
Step 6
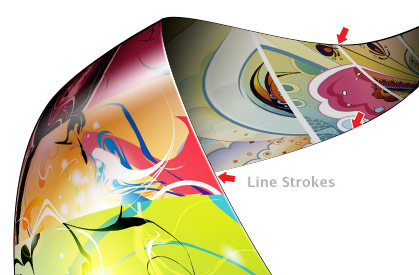
Select the path and open the 3D Revolve Options again. We'll choose the same settings, since the pin will have to be aligned with the head, but we will add two more highlights. Align them as you see in the image below. Make sure you have the Preview selected.
Step 7
Move the pin upwards and behind the red pin head. The shortcut for aligning layers and paths is Ctrl + [ (behind) and Ctrl + ] (in front).
Step 8
Select the Blue head shape and choose Overlay in the Transparency Palette. This will enable us to see the pin and align it better.
Step 9
The pin just looked a little too short, but since we have not expanded any of your 3D effects, we can easily transform the objects. Select the bottom path point with the Direct Selection Tool and lengthen the pin. All our 3D effects will be automatically applied. Then set the Blue head shape back to Normal.
Step 10
Create a new layer underneath the pin layer and call it "paper." Create a rectangular shape with the Pen Tool (P). Then choose a light blue color and fill it.
Step 11
Copy the rectangular shape underneath by pressing Ctrl + C. Then press Ctrl + B and color it with a linear gradient from black to medium grey. Transform it slightly with the Direct Selection Tool (A) by selecting the points and handles and dragging it around until the shape is a little bigger than the paper shape.
Step 12
Select the grey pin part and shorten it so it looks like it pierces through the paper. You can do this by selecting the bottom path point with the Direct Selection Tool (A) and drag the point upwards. The 3D effect will be automatically adjusted.
Step 13
Select the Blue pin head and make a copy. While still selected, go to Object > Expand Appearance. This will apply the 3D effect.
Step 14
Keep the object selected and open the Pathfinder Palette. Choose Add To Shape Area from the Shapes Modes.
Step 15
Fill the shape with black and go to Object > Path > Simplify. Move the cursor for the Curve Precision to 100%. This will reduce some points that are unnecessary quickly.
Step 16
Select our shadow shape, rotate it, scale it, and skew it until it resembles the image below.
Step 17
Apply a linear gradient that goes from a medium to light grey. This will make our shadow look more realistic.
Step 18
Select the paper shape and make a copy on top of it by pressing Ctrl + C + F. Then open the Swatch library patterns by clicking on the Arrow on the right hand side of the Swatch Palette. In the drop down, choose Open Swatch Library > Patterns > Basic Graphics > Basic Graphic_Textures. I chose the pattern called USGS Sewage Disposal. Fill the shape with the pattern and set the Transparency to Multiply and its Opacity to 8%. Now we have lined paper.
Step 19
Voila, your very own push pin and note paper.