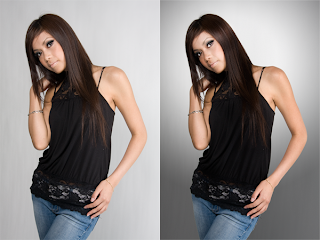
Before and After
This Photoshop tutorial is written for experienced Photoshop users and will show you unique techniques for retouching photos. You’ll learn how to enhance backgrounds, dodge and burn, brighten eyes, and add hair shine while keeping a low count of layers. The techniques you learn from this tutorial can be used for other portrait photos.
Retouching a Studio Portrait Photoshop Tutorial
Retouching the background
Here is the original image. As a photo it looks fine but it looks flat and boring. This Photoshop tutorial will show you techniques used to make the photo have a stronger impact. You can follow this tutorial with one of your own image or you can use the image below:
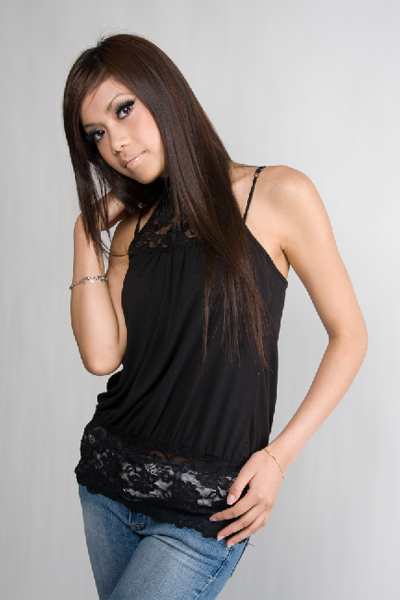
Creating the mask
The first step is to isolate the model from the background. I used the extract and color range tool to create this. First I used the extract tool (Filter > Extract) but it didn’t work very well for the hair.
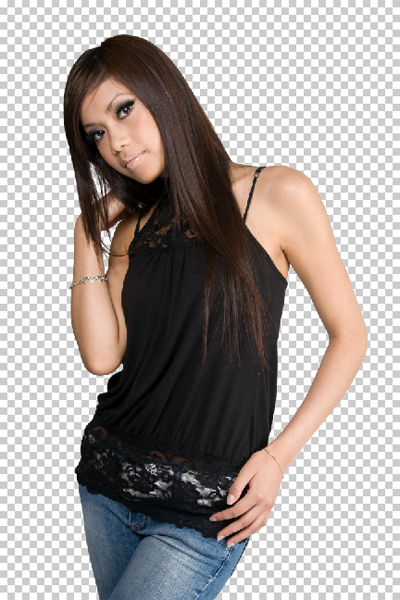
I then use the color range tool (Select > Color Range) to select the areas that were hard to extract using the extract tool.
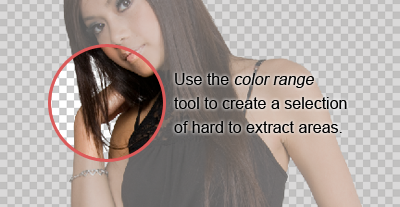
Now we have a mask in it’s own layer.

Adding a gradient to the background
With the mask created, I can add a gradient to the background. Adding a gradient to the background is a simple and effective way to enhance a boring background. Here is a preview of what the layers will look like in the end.
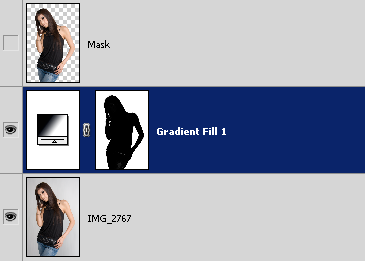
To create a gradient background, we’ll be adding a gradient fill layer using the mask that we just created. To do that, hold down the Ctrl key and click on the layer thumbnail of the layer “Mask”. It will load the selection of the layer. Choose Select > Inverse to inverse the selection. Then, choose Layer > New Fill Layer > Gradient.

In the Gradient Fill tool, move the center of the gradient behind the head. You can do this by clicking and dragging on the document window.
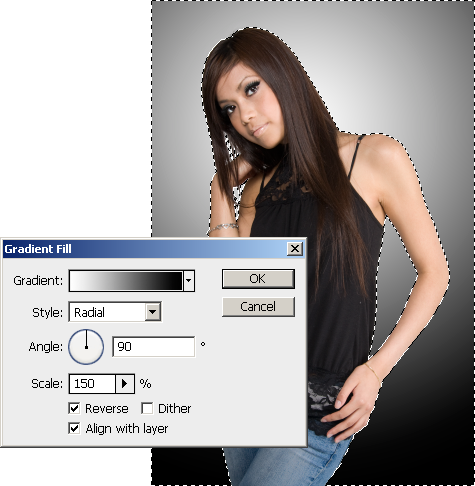
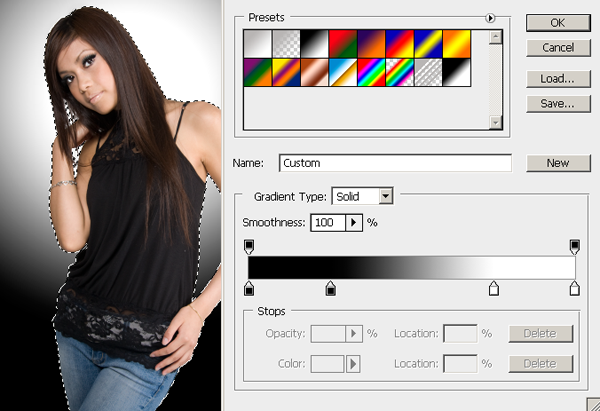
To increase contrast, you can change the gradient so that it is like the image below.
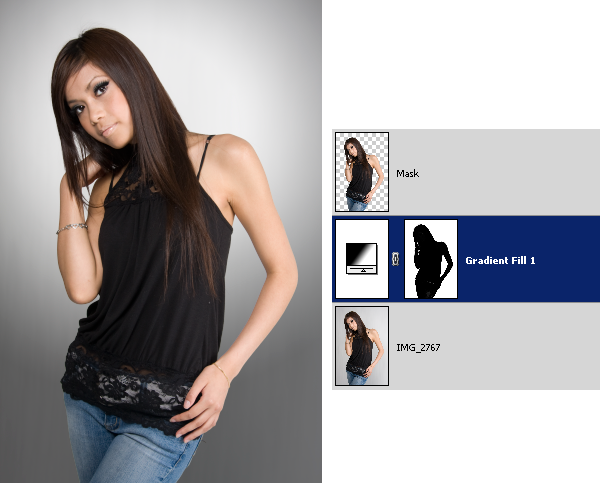
Finally, adjust the opacity of the Gradient Fill layer. I set mine to 50% opacity.
Tone
Begin by creating a new layer for dodging and burning. Position the layer above the gradient fill adjustment layer. Then, change the blending mode to soft light.
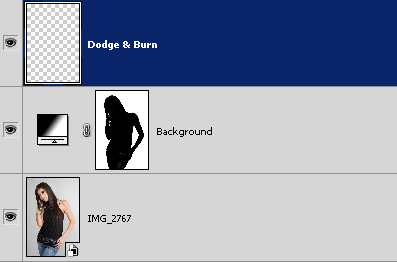
Choose Edit > Fill and use the settings below.
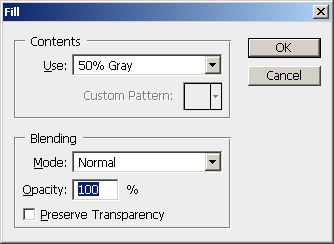
The layer should now be filled with a 50% gray.
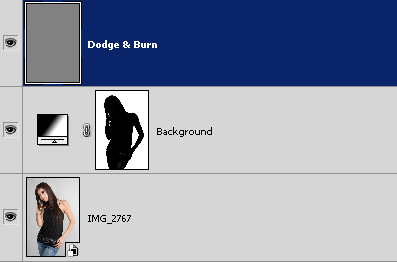
Add a layer mask using the shape from the Mask layer. Hold down the Ctrl key and click on the layer thumbnail of the Mask layer . Then, click on the ![]() in the layers palette to add a layer mask.
in the layers palette to add a layer mask.

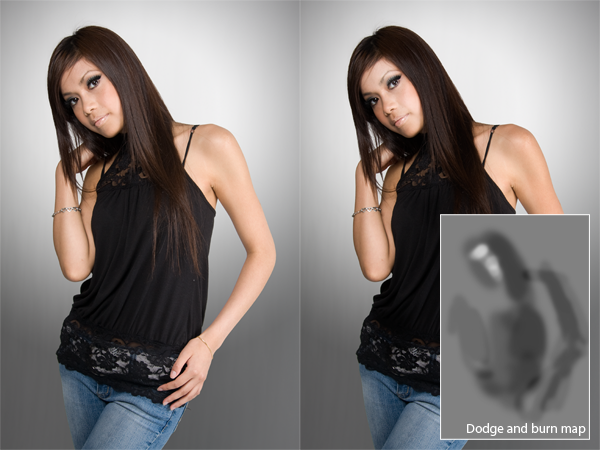
Click back on the 50% gray layer thumbnail and use the dodge and burn tools. For the image below, I used the burn tool to darken the models right side of the face, hair, top, and her arms. Then, I use the dodge tool to brighten the other side of the models face.
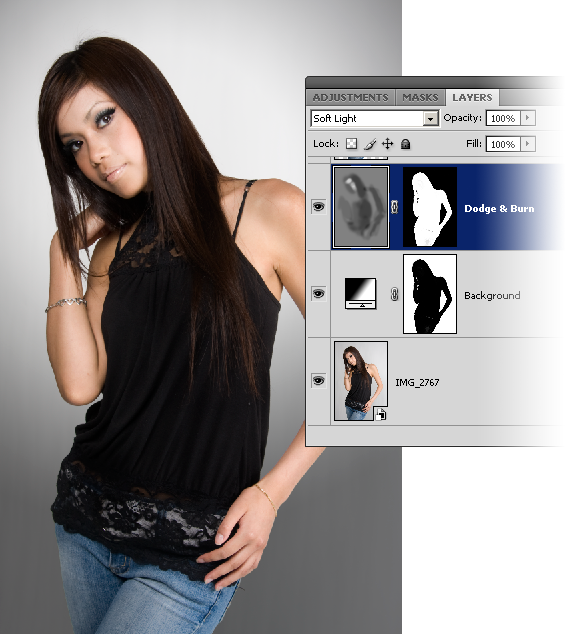
Here is a before and after effect of the dodging and burning.
Eye Brightening
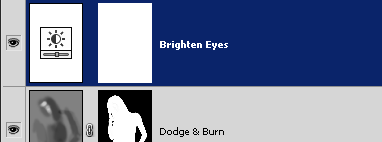
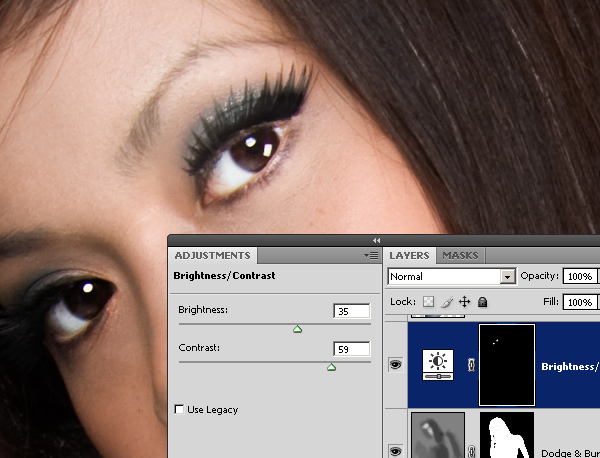
Brightening the eyes will have a dramatic effect. It can be easily done by using a Brightness/Contrast adjustment layer. Choose Layer > New Adjustment Layer > Brightness/Contrast to add a new Brightness/Contrast adjustment layer. Rename this layer to Brighten Eyes.
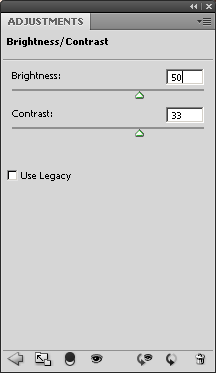
For now, set the brightness to 50 and contrast to 33.
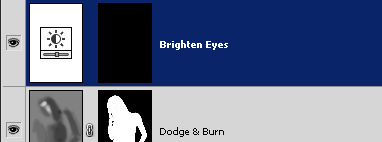
Select the layer mask and choose Image > Adjustments > Invert. This will invert the layer mask from white to black.
Using the brush tool, paint the layer mask where the eyes are. You should see the eyes brighten as you paint. Then, go back into the Brightness/Contrast settings and readjust the settings.
Hair Shine
Finally, we’ll add a shine to the hair. Start by using the quick selection or magic wand tool to create a selection of the hair around the area where you want the shine to appear.
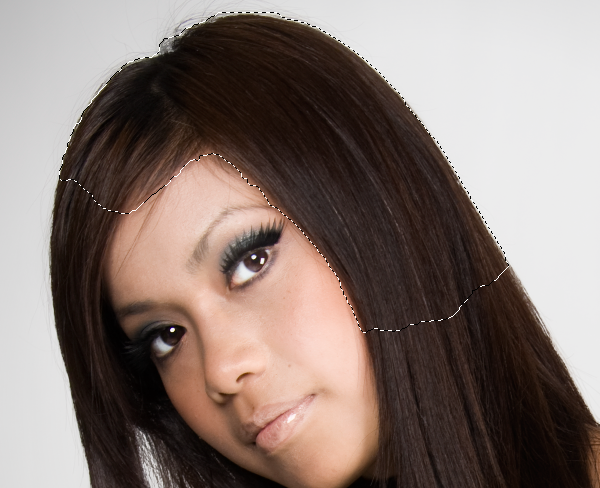
With the selection, choose Layer > New Fill Layer > Gradient. Position the layer above the Brighten Eye layer. Change the blending mode of the Hair Shine layer to overlay. You should have a layer like the image below.
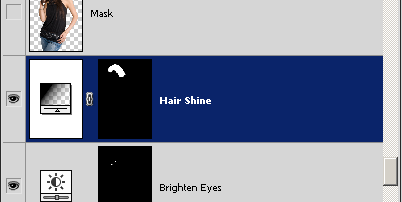
Go back into the Gradient Fill settings. Set the gradient to white to black and style to reflected. Checkmark the reverse option then click and drag on the document window and position the gradient where you want the hair shine to appear. Adjust the scale.
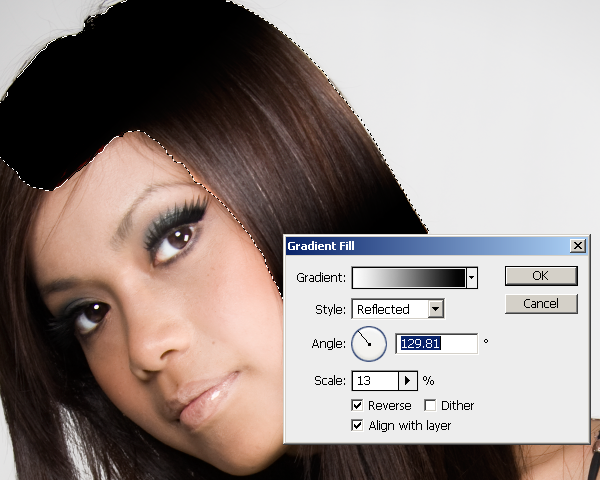
In the Gradient Fill window, click on the gradient to edit it. You should have a window like the image below. Create a gradient like the image below. To do this, click and drag the top left input slider to the middle of the gradient bar. Do the same with the bottom left input slider. Then, click on the individual input sliders and adjust the settings as shown in the image below.
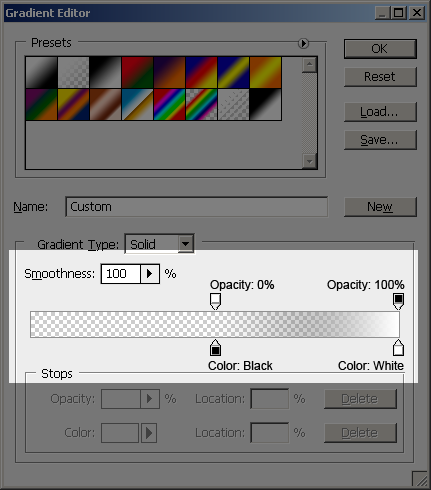
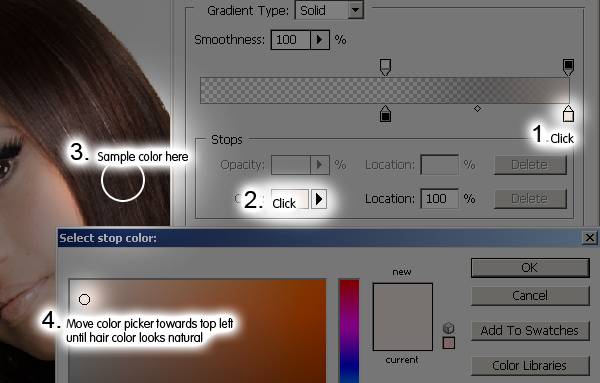
We now have a hair shine but it does not match the color of the hair. We’ll add back a little of the hair color to the shine.
- Click on the bottom left input slider.
- Click on the color setting and a color picker window will appear.
- Click on the hair to capture the color of the hair.
- Move the color picker towards the top left until the hair color looks natural.
- Click OK three times to exit out of the gradient settings.
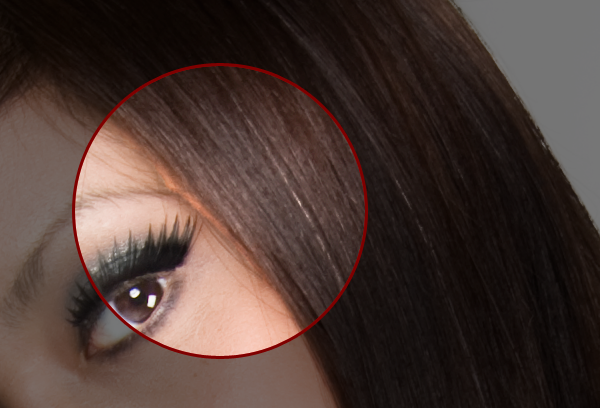
We have added the hair shine but if you look closely, you can see some artifacts.
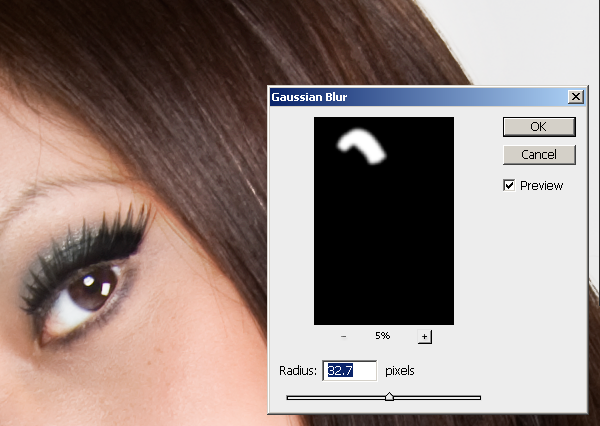
We can easily fix this by blurring the layer mask. Select the Hair Shine layer mask then choose Filter > Blur > Gaussian Blur. Adjust the settings until the unclean edge fades.
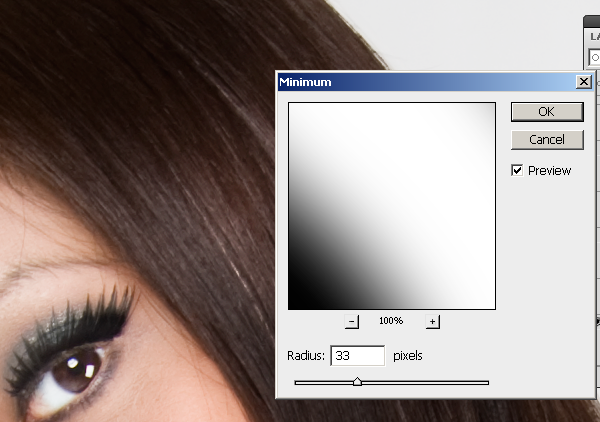
If the hair shine is overlapping the skin, use the Minimum filter to hide it. Choose Filter > Other > Minimum and adjust the slider.
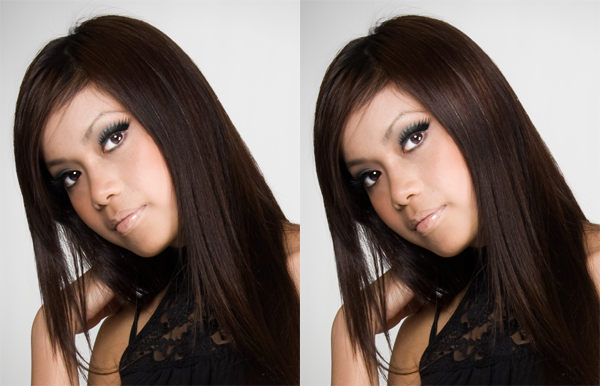
Here is the before and after effect of adding hair shine. You can add emphasis to the eyes by aligning the hair shine with the eyes.
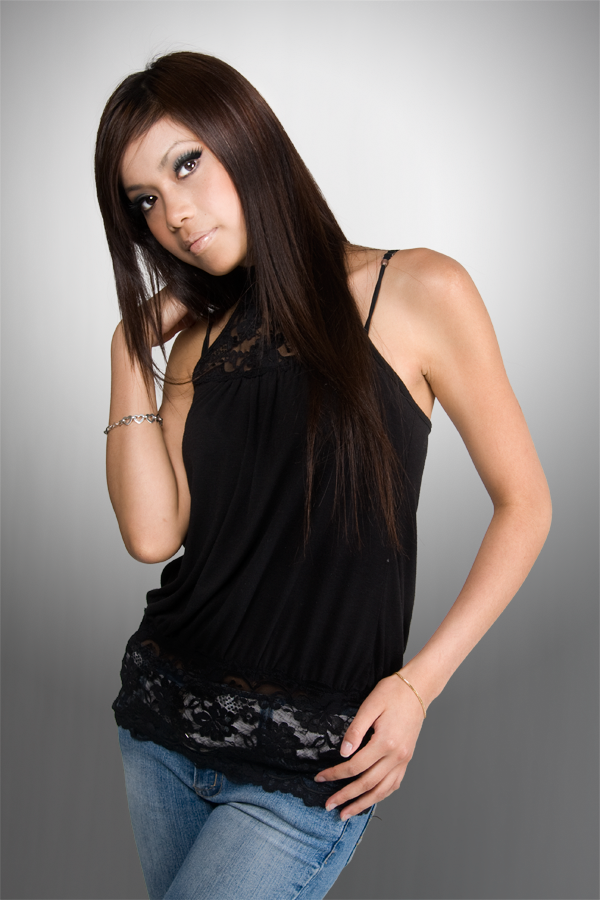
Final Results


10 comments:
AMUSING!!
COOL STYLE DESIGN! keep on the great tutorial!
to ARC..
thanz... hehehe....
to caturist...
hahaha... 10Q...
This is absolutely awesome tutorial. Thanks.
to photo restoration...
welcome... :p
I wanna try but am too shy to snap a model-like picture of myself hahahha
to ARC..
it ok pew... hahaha...
very informative blog...i like it..thanks for sharing....
welcome... thanz... spy kte bley belaja sama2... :p
Post a Comment